

The Basements PON
🌿 Welcome to The Basements PON Experience🌿
This isn’t just potting — it’s the smarter, cleaner, and freer way to connect with your plants.
The Basements PON is a soilless substrate built for modern plant lovers. It offers superior drainage, breathability, and long-term structure. No fancy techniques required — just treat it like soil, with a few smarter habits, and you’ll unlock a next-level growing experience.
The following guide walks you through every step: potting, watering, fertilizing — all the things that make plants thrive and keep your setup clean, sharp, and stress-free.

First-Time Opening 1/2
Place the entire bag of PON on a flat, stable surface before opening. If the surface is uneven or the bag is suspended in the air, it may cause tension on the zip lock during tearing, potentially damaging it and making it unusable for resealing.
Then, open the bag by tearing along the designated line at the back zip lock area, as designed for first-time access.

First-Time Opening 2/2
After tearing open the zip lock, you will see an inner sealing strip. Gently pull open the seal to fully access the contents of the bag and prepare to use the PON.

Rinsing (Recommended but Not Required)
Before first use, you may choose to rinse the PON with clean water. Since PON is made of three different types of mineral stones with varying hardness, friction during transportation may cause small fragments or dust to form.
To make this step easier, we’ve designed a drainage hole at the bottom of the packaging. This allows you to rinse and drain the PON directly in the bag, then let it air dry before use.

Potting (1/5)
Select a pot that fits the size of your plant. Start by adding a base layer of PON — about one-fifth the height of the pot. This helps with drainage and aeration, and also prevents the roots from clustering at the bottom in the early stages, encouraging healthier and more even downward growth.
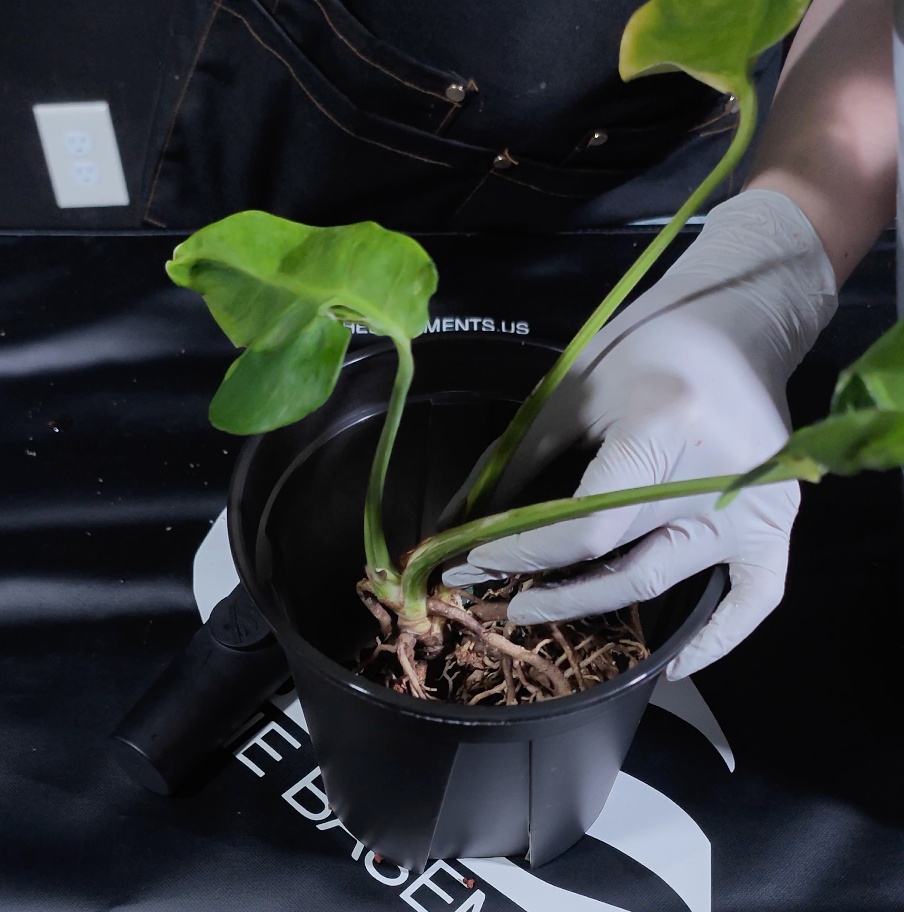
Potting (2/5)
Hold the plant in your hand and gently arrange the roots. Place the root system into the pot to check the position and height — but keep holding the plant without letting it rest on the bottom. Once you’ve centered it and determined the ideal planting height, gently press the entire root mass downward by about half an inch. This creates space for the top layer of PON and helps secure the roots in place.

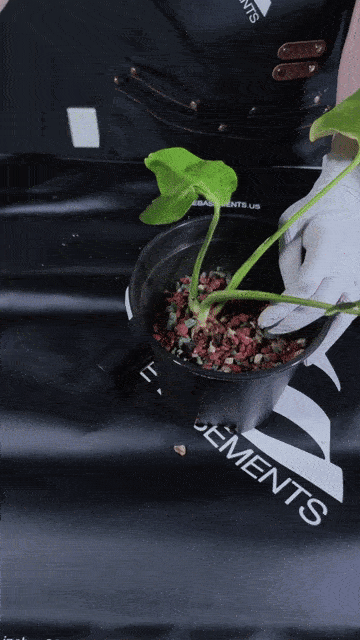
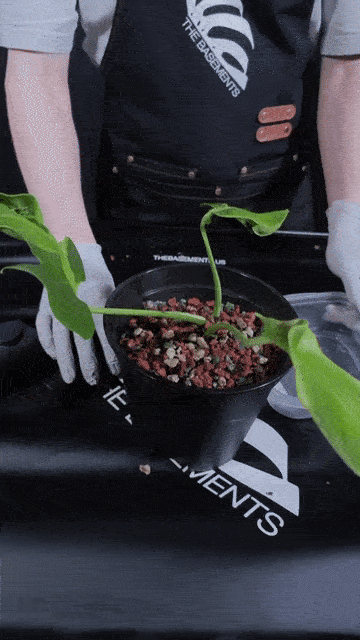
Potting (3/5)
Once the plant is held in place, begin slowly adding PON from the sides, evenly filling around the roots until the substrate reaches about two-thirds of the pot’s height. Then, gently release the plant and let it stand on its own.
Take a moment to check whether the plant is centered and upright. Don’t worry about the final height just yet — we’ll fine-tune that in the later step.
Potting (optional)
This step is optional and intended for those who wish to incorporate slow-release fertilizer. We recommend using only half the amount suggested on the fertilizer packaging.
Distribute the pellets evenly around the inner edge of the pot — do not place all the fertilizer in one spot. Avoid direct contact with the roots, as concentrated nutrients may cause root burn. The ideal placement is a ring around the perimeter of the pot.
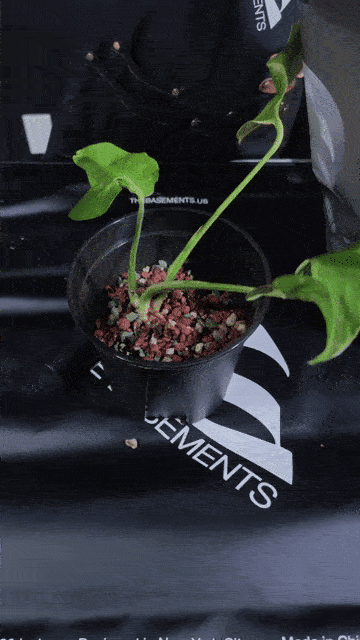
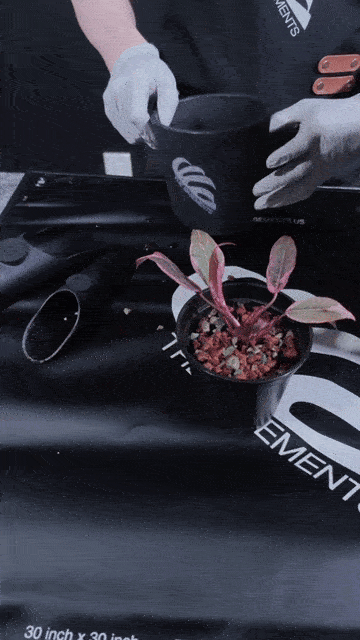
Potting (4/5)
Fill the pot with PON to your desired level — slightly higher (about 0.5 inch) is fine. Adjust the height based on the plant type:
- For most plants: cover up to the last leaf on the base
- For vining types: just cover the leafless stem
If you’re aiming for high-position rooting, go a bit higher. In general, leave about 1 inch of space below the pot’s rim for watering and stability.
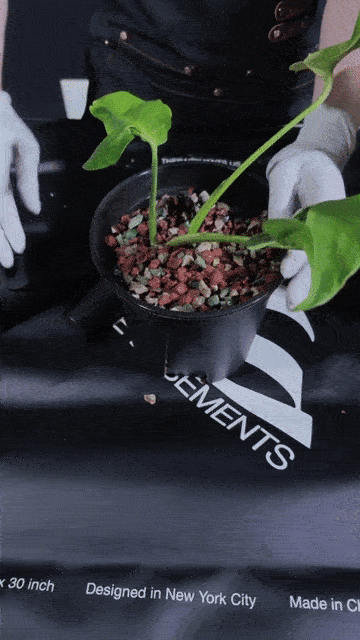
Potting (5/5)
The last step is to adjust the PON and plant position to ensure even root distribution and a firm base.
Tap around the outer edge of the pot to compact the PON and eliminate air pockets, which can leave roots dry and damaged.
At the same time, gently lift the plant about 0.5 inch as you tap. This prevents root crowding at the bottom and helps encourage healthy downward growth.
watering
The simplest way to water is by pouring slowly in a circular motion along the edge of the pot. When using PON, it’s important to develop the habit of fully saturating the entire substrate during each watering.
We recommend placing a saucer under the pot. Details about how much water to use are covered in the following “Watering Section.”
watering with The Basements Pot (1/2)
Place the fully potted plant into The Basements Pot. Then, water slowly and evenly around the edge of the pot, making sure that all of the PON substrate and the plant’s root system are completely saturated. A thorough initial watering helps ensure good contact between the roots and the medium, setting a solid foundation for healthy growth.

watering with The Basements Pot (2/2)
The Basements Pot features a water indicator window that allows you to monitor the internal water level.
After thoroughly saturating all the PON, take a moment to check the indicator. We recommend topping up the water to about two-thirds of the indicator’s height.
This level ensures that the bottom roots have access to moisture without submerging the entire root system, helping to prevent root rot while maintaining an ideal hydration balance.
watering with saucer
Choose a suitable saucer to place under your pot — it can be a standard plant tray or even a disposable food container. We recommend a saucer with a height of 2–3 inches. Its main purpose is to act as a water reservoir, allowing the plant to continue absorbing moisture after watering.
When watering, use the same circular method along the pot’s edge. First, ensure all the PON and roots are fully saturated.

watering with saucer
Water will drain into the saucer — ideally, keep the water level at about 2 inches high.
Once the water in the saucer has almost completely dried out, repeat the same watering process. This routine keeps the lower roots hydrated without over-saturating the upper substrate.
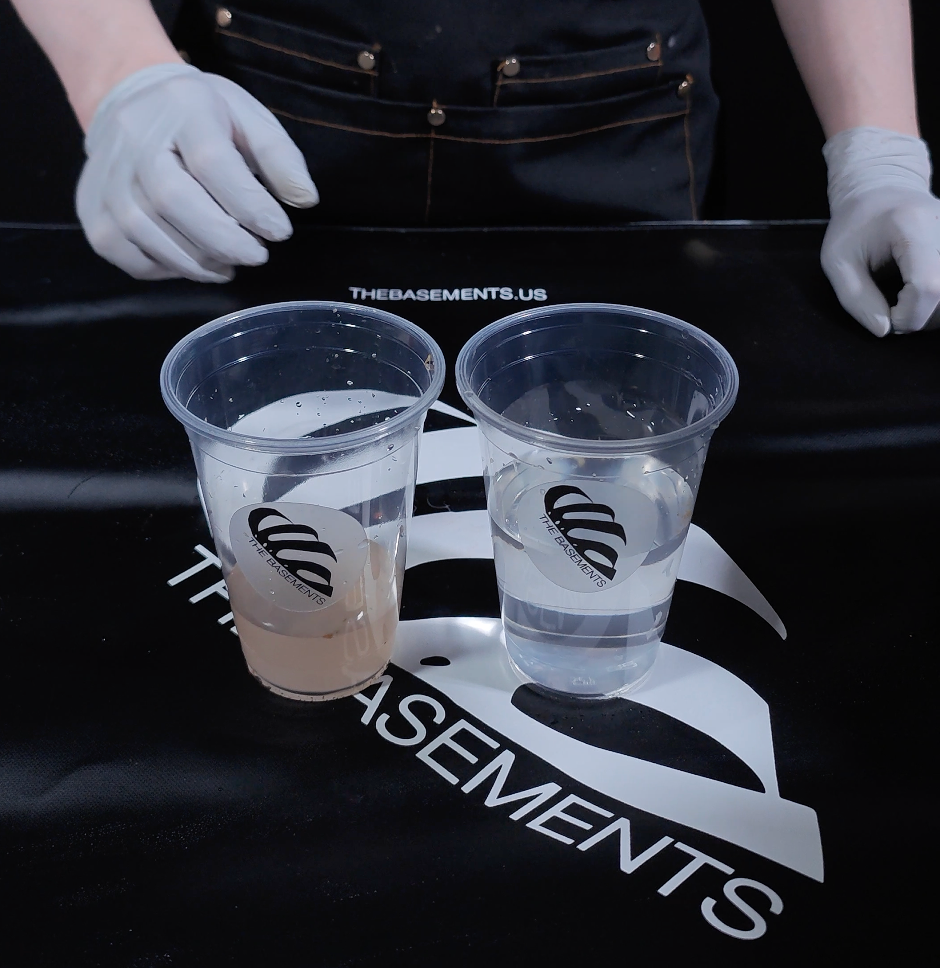
Water Base Fertilizer
When starting out, it’s best to use half the dosage recommended by the manufacturer to avoid stressing the plant’s roots in a new environment.
Our suggested method: prepare the fertilizer at the full recommended strength and label it as “Solution 1.” Prepare plain water as “Solution 2.” Then mix Solution 1 and Solution 2 in a 1:1 ratio — this diluted mixture will be used in place of water for routine watering.

Water Base Fertilizer
The watering method remains exactly the same as previously described — only the liquid is different.
Since water-soluble fertilizer tends to accumulate in the substrate over time, we recommend using it every other watering. This helps reduce the risk of root burn caused by excess nutrients.