

This Isn’t Just Unboxing. It’s how we begin.
We know plants aren’t just products — they’re alive, unpredictable, and sometimes fragile.
We also know that when things go wrong, it can feel personal.
That’s why this guide exists: to walk through the process with care, step by step.
If something doesn’t look right, don’t rush to react.
Finish the process first — and if you need us, we’re right here.
Important Reminder — Document Everything
Before you touch anything, take photos. Trust us — it helps.
Before starting any root or leaf treatment, we strongly recommend you take clear photos of:
- The plant’s overall condition upon arrival
- Close-ups of anything you plan to cut or remove
- Any significant moments in the process (e.g., final root state before potting)
These photos serve two important purposes:
- They become a valuable record for your own learning and growth as a plant keeper
- They can act as proof if you need to reach out to us for support or questions
📝 Also consider taking photos after each major step — trimming, cleaning, or repotting — to track your progress.
You’re not just caring for the plant — you’re documenting its story.
🧼 Before Root Inspection
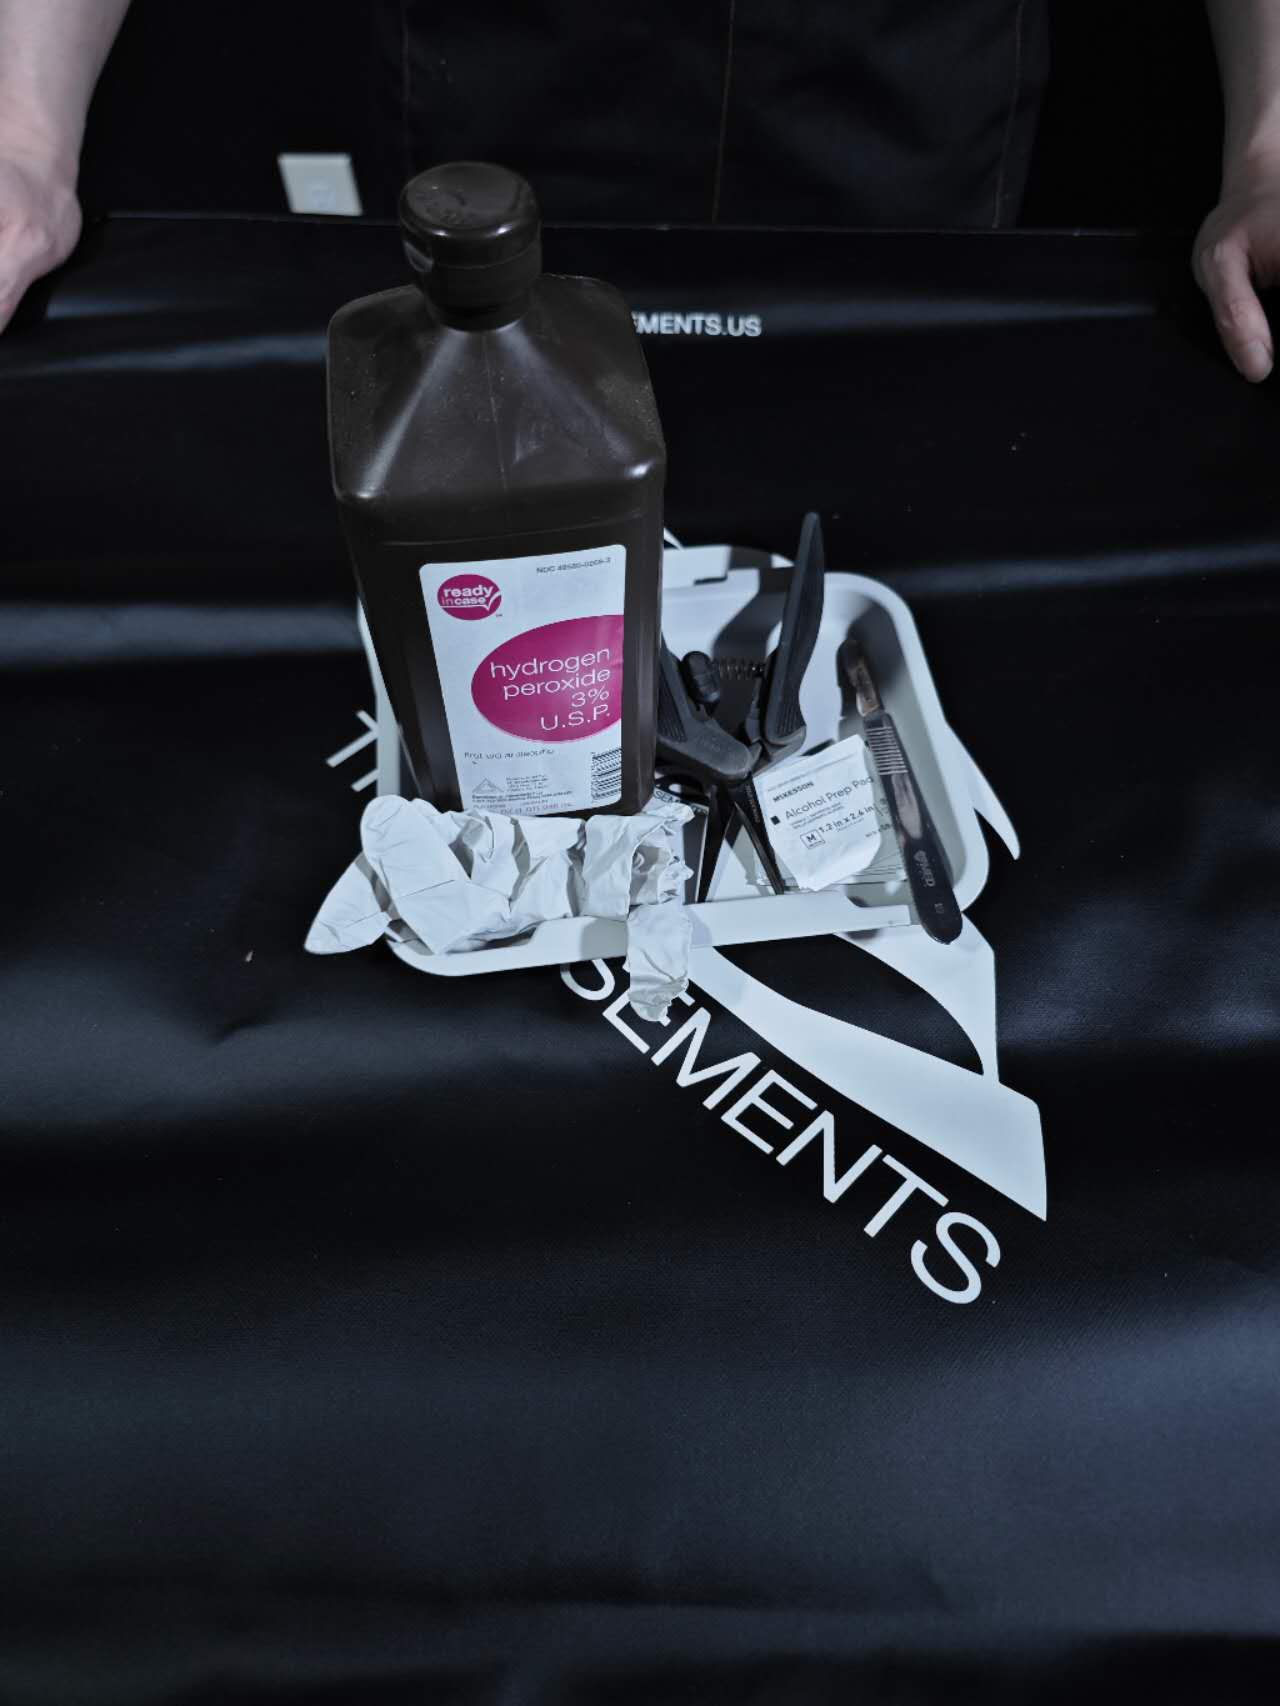
Before handling roots, make sure you have the following items ready:
Pointed-tip scissors (for trimming roots)
3% hydrogen peroxide (standard household antiseptic — available at any grocery store)
Disposable gloves
Disinfecting wipes or alcohol pads
Before starting any operation, thoroughly disinfect all tools and surfaces.
Every time you cut or touch a new part of the plant, sanitize your scissors again before continuing. This helps prevent cross-contamination or infection, especially if multiple plants are being handled.
Clean before use. Clean after use.
This habit keeps your plants — and your workspace — safe and healthy.
🌿 Roots Care: Visual Check
Start with observation and gentle separation.
Pick up the plant and begin with a visual inspection of the root system:
- Look for any blackened, brown, mushy, or broken roots
- Note any sections that appear discolored, dried, or severely damaged
- Gently shake the plant — any roots that are already detached will fall off on their own
⚠️ If you see dark or soft areas, continue inspecting further down the root — we’ll address trimming in the next step.
Do not force anything off at this stage — we’re just observing and allowing anything naturally loose to separate
🌿 Roots Care: Step 2 — Finger Test
Gently feel the roots — firm or mushy?
After the visual check, now use your fingertips to gently press any questionable or unclear areas on the roots.
- Healthy roots should feel firm and springy
- Rotting roots will feel soft, mushy, or hollow under light pressure
This step helps you further identify what’s alive and what’s not.
There’s no need to pull — just feel with care.
Your touch should be soft — we’re feeling, not squeezing.

✂️ Roots Care: Step 3 — Remove dry or broken roots
Don’t panic — breakage is common. Let’s fix only what needs fixing.
After the visual and finger checks, it’s time to trim.
First, focus on any fully broken or shriveled roots.
These are common during transit — there’s no need to worry.
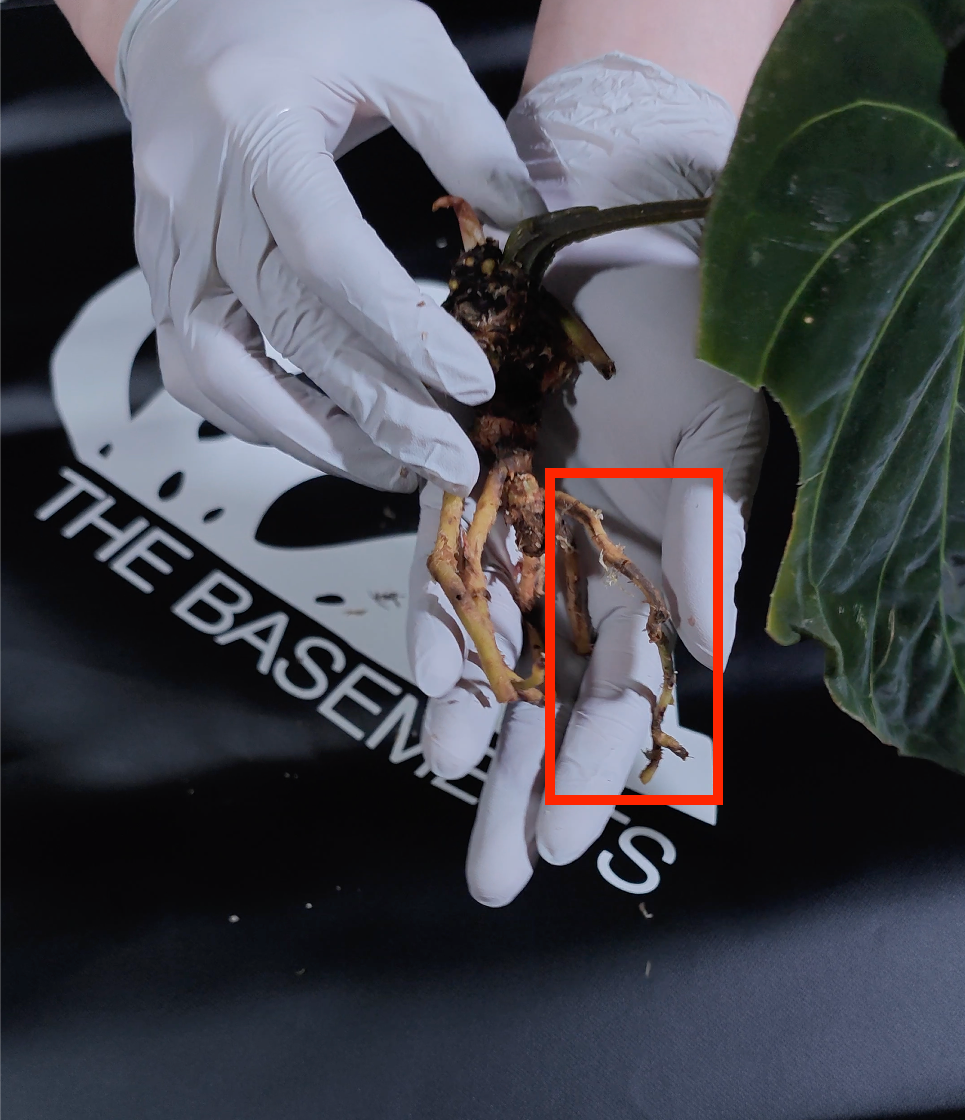
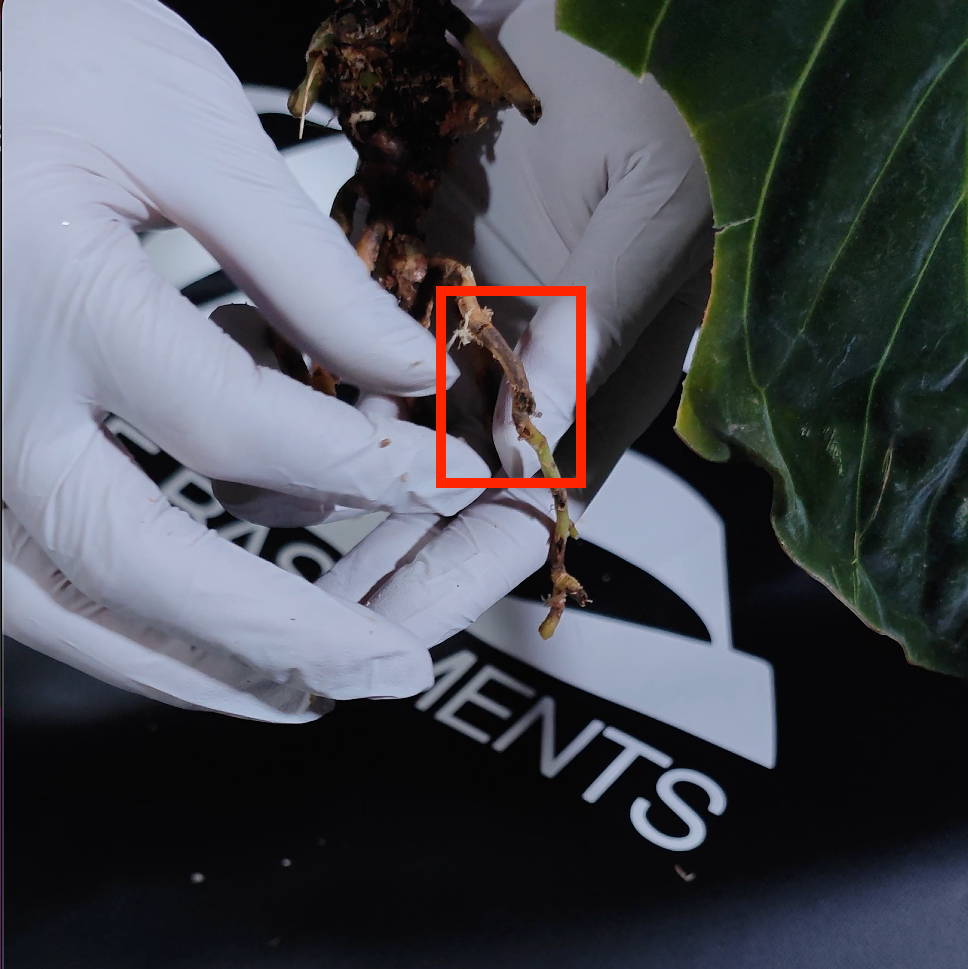
Take a moment to distinguish true breakage from harmless outer-layer peeling:
- If it’s just the outer skin flaking or peeling, leave it — this is a natural result of root aging and lignification (developing a woody shell for protection).
- If the root is completely broken or dried up, like in the example shown, it should be trimmed off.
This stage is only for dry, broken, or clearly non-functional roots.
We’ll address mushy or rotting roots in the next step.
✂️ Roots Care: Step 4 — How to trim damaged or dried roots
Sanitize first. Cut precisely at the right spot.
Before trimming, make sure your scissors are properly disinfected — wipe them with alcohol or 3% hydrogen peroxide.
If you need to cut multiple areas, sanitize the scissors after each cut.
Focus on roots that are clearly broken or completely dried out. When trimming:
- Use sharp pointed scissors to cut about 1/8 inch (3 mm) above the damaged or shriveled area
- This helps ensure you remove not just the visible damage, but also the zone where bacteria could develop due to prolonged exposure to moisture
The goal is to make a clean, controlled cut into healthy tissue, not too close to the injury, and not too far.

✅ Roots Care: Step 5 — Final Check & What’s Next
Are there still black, brown, or mushy roots?At this point, do a final check:
- If you still see any blackened, browned, or mushy roots — stop here and proceed to the next treatment step for rot removal
- If not, confirm that you’ve removed all broken, dried, shriveled, or detached roots
Now assess the remaining root mass:
- If only a few roots remain — such as a single-leaf cutting with one short main root, or a plant with almost no roots at all — you’ll need to move to water propagation to help it recover
- If your plant has enough healthy roots, as shown in the photo, then you’re ready to pot it directly
Any Brown or Black (Mushy) ?
⚠️ Roots Care: Special Case — Black or Brown Roots
Don’t panic — let’s check it step by step.
Seeing black or brown roots can be alarming, especially for beginners — but it’s more common than you think.
In our greenhouse, we handle hundreds of cases like this, so trust the process and stay calm.
⚠️ Roots Care: Special Case — Black or Brown Roots
Here’s how to evaluate:
- Press gently with your fingertip.
- If the root feels hollow or “deflated”, that means the root has died, and only the outer casing remains., or even ignore it — it won’t harm the plant.
- If the root leaks fluid or collapses when pressed, that’s active rot — this must be removed.

✂️ How to remove actively rotting roots
- First, clean your fingertips with alcohol (after touching the rot).
- Then, take disinfected scissors and follow the root upward to find the start of the black/brown zone.
- Cut about 1/4 inch (6 mm) above the visibly affected area.
🧪 Now examine the cut surface:
- If the center (vascular core) is completely clean and white — you’re done.
- If there’s any darkness or discoloration in the center, sanitize your scissors again, and cut another 1/4 inch higher.
Repeat this process until the entire cross-section is clean and healthy.
🧪 Roots Care: After Black Rot — Disinfection & Drying
Kill any residual bacteria. Prevent reinfection.
After trimming black rot, it’s critical to disinfect the remaining root system to avoid:
- Residual rot bacteria spreading through packing materials
- Cross-contamination via scissors or exposed cuts
Here’s how to disinfect safely:
- Mix 3% household hydrogen peroxide (check label) and clean water at a 1:1 ratio in a clean container
- Quickly dip and swirl the entire root system — especially freshly cut areas — 5 times in the solution
- After dipping, move the plant to a new, clean area — away from any surfaces or tools that came in contact with rotting roots
- Let the plant air-dry naturally in a ventilated space. Once the root surface is dry, it’s ready for potting or water propagation
⚠️ Do not let the roots sit in the solution. This is a quick rinse, not a soak.
Use this section to describe a product or welcome your customers.
🍃 Leaf Care — Handling Broken Leaves in Transit
It happens — stay calm and let’s handle it properly.
Sometimes, despite our best efforts, a leaf may break during shipping, especially at the petiole (leaf stem).
We understand this can be frustrating — but don’t worry, it won’t affect the health of the plant.
If this happens:
- First, stay calm and focus on caring for the plant
- You can always contact us after handling for support or resolution — we’re here to help
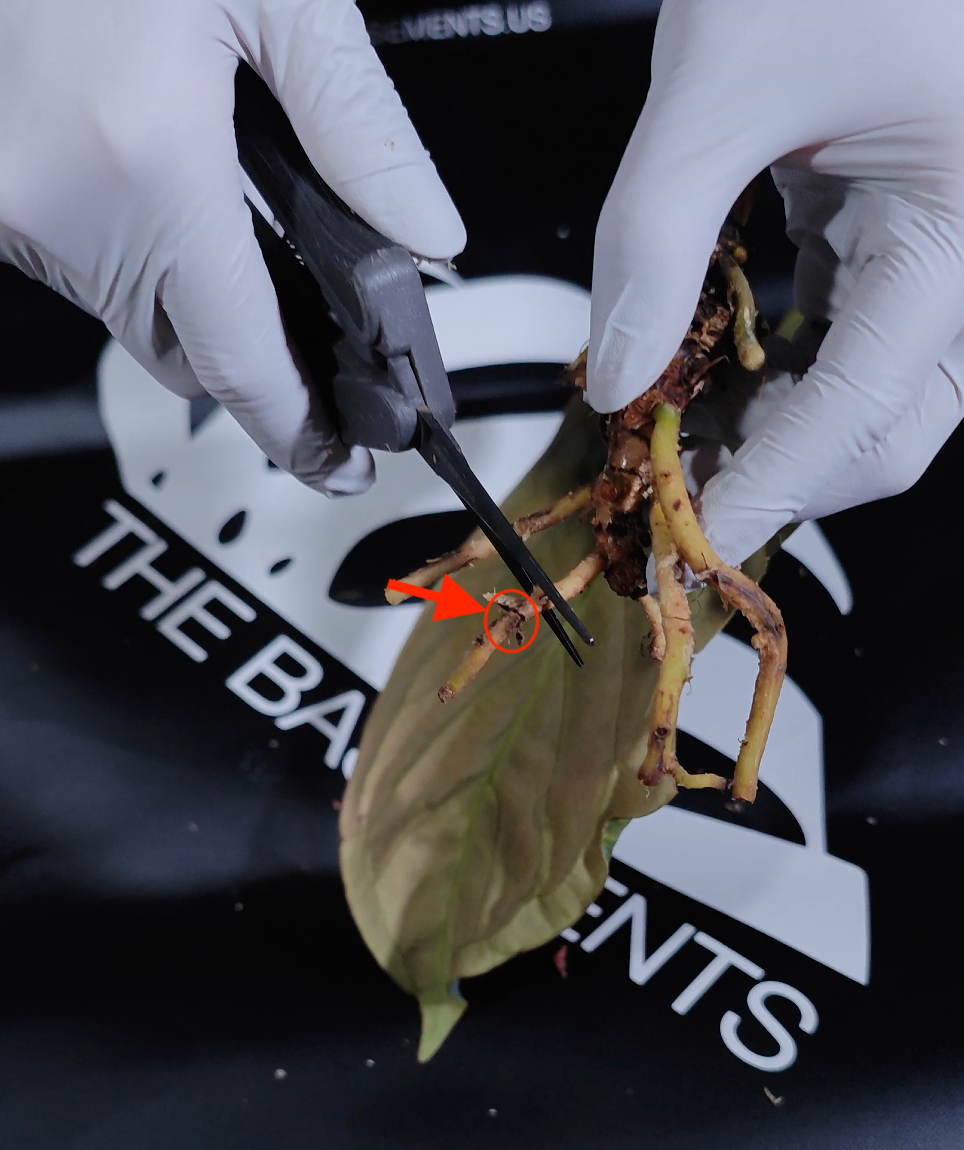
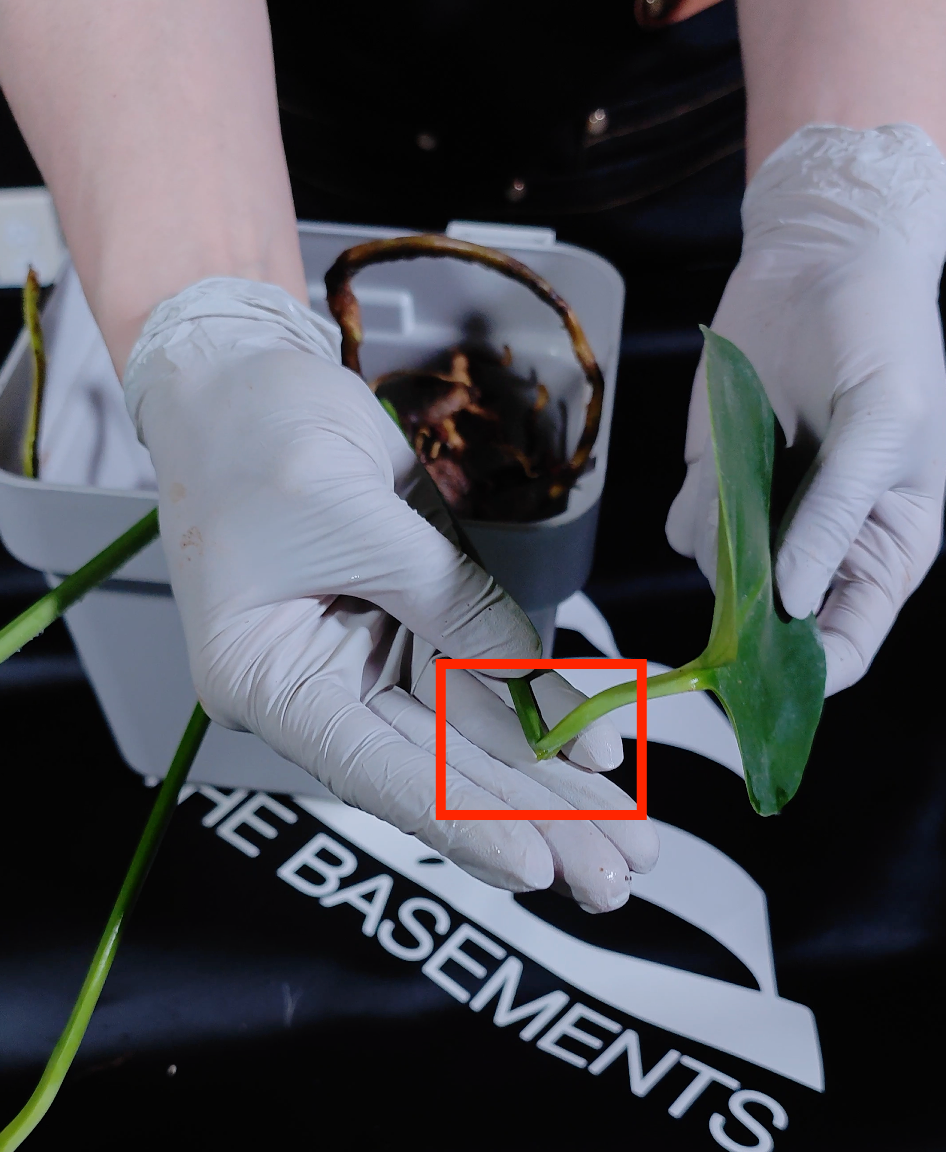
If the leaf is broken at the base, as shown in the red box, this leaf is no longer viable and will fall off on its own.
🍃 Leaf Care — Handling Broken Leaves in Transit
In this case:
- Use scissors to cut it cleanly at the break
- ⚠️ Never pull or snap by hand — that may cause tearing or damage to surrounding tissue
Clean cuts = faster healing. We want the plant to focus energy on recovery, not wound repair.
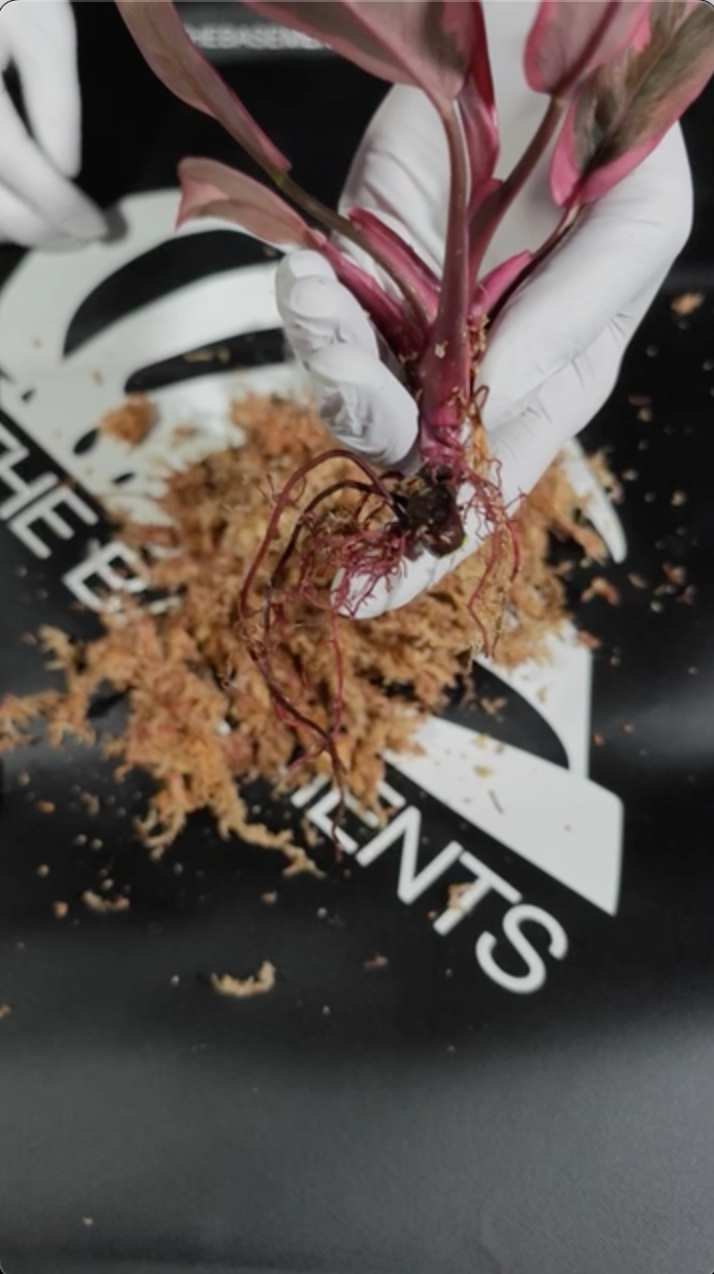
🍃 Leaf Care — Case 2: Soft Leaves from Energy Reabsorption
Yellowing leaves are normal — it’s the plant protecting itself.
Sometimes during shipping, plants intentionally reabsorb water and energy from their older leaves to survive stress. This can cause leaves to become soft, dull, or limp — but it’s not a sign of injury.
Here’s how to handle it:
- If your plant has more than one leaf, you can gently remove the soft leaf from the base, as shown in the photo
- If your plant has only one leaf, it’s best to leave it attached for now.
You can also choose to ignore the leaf completely — it won’t hurt the plant.
🍃 Leaf Care — Case 3: Minor Damage? Let the plant handle it.
If it’s just small spots or yellowing — don’t worry.
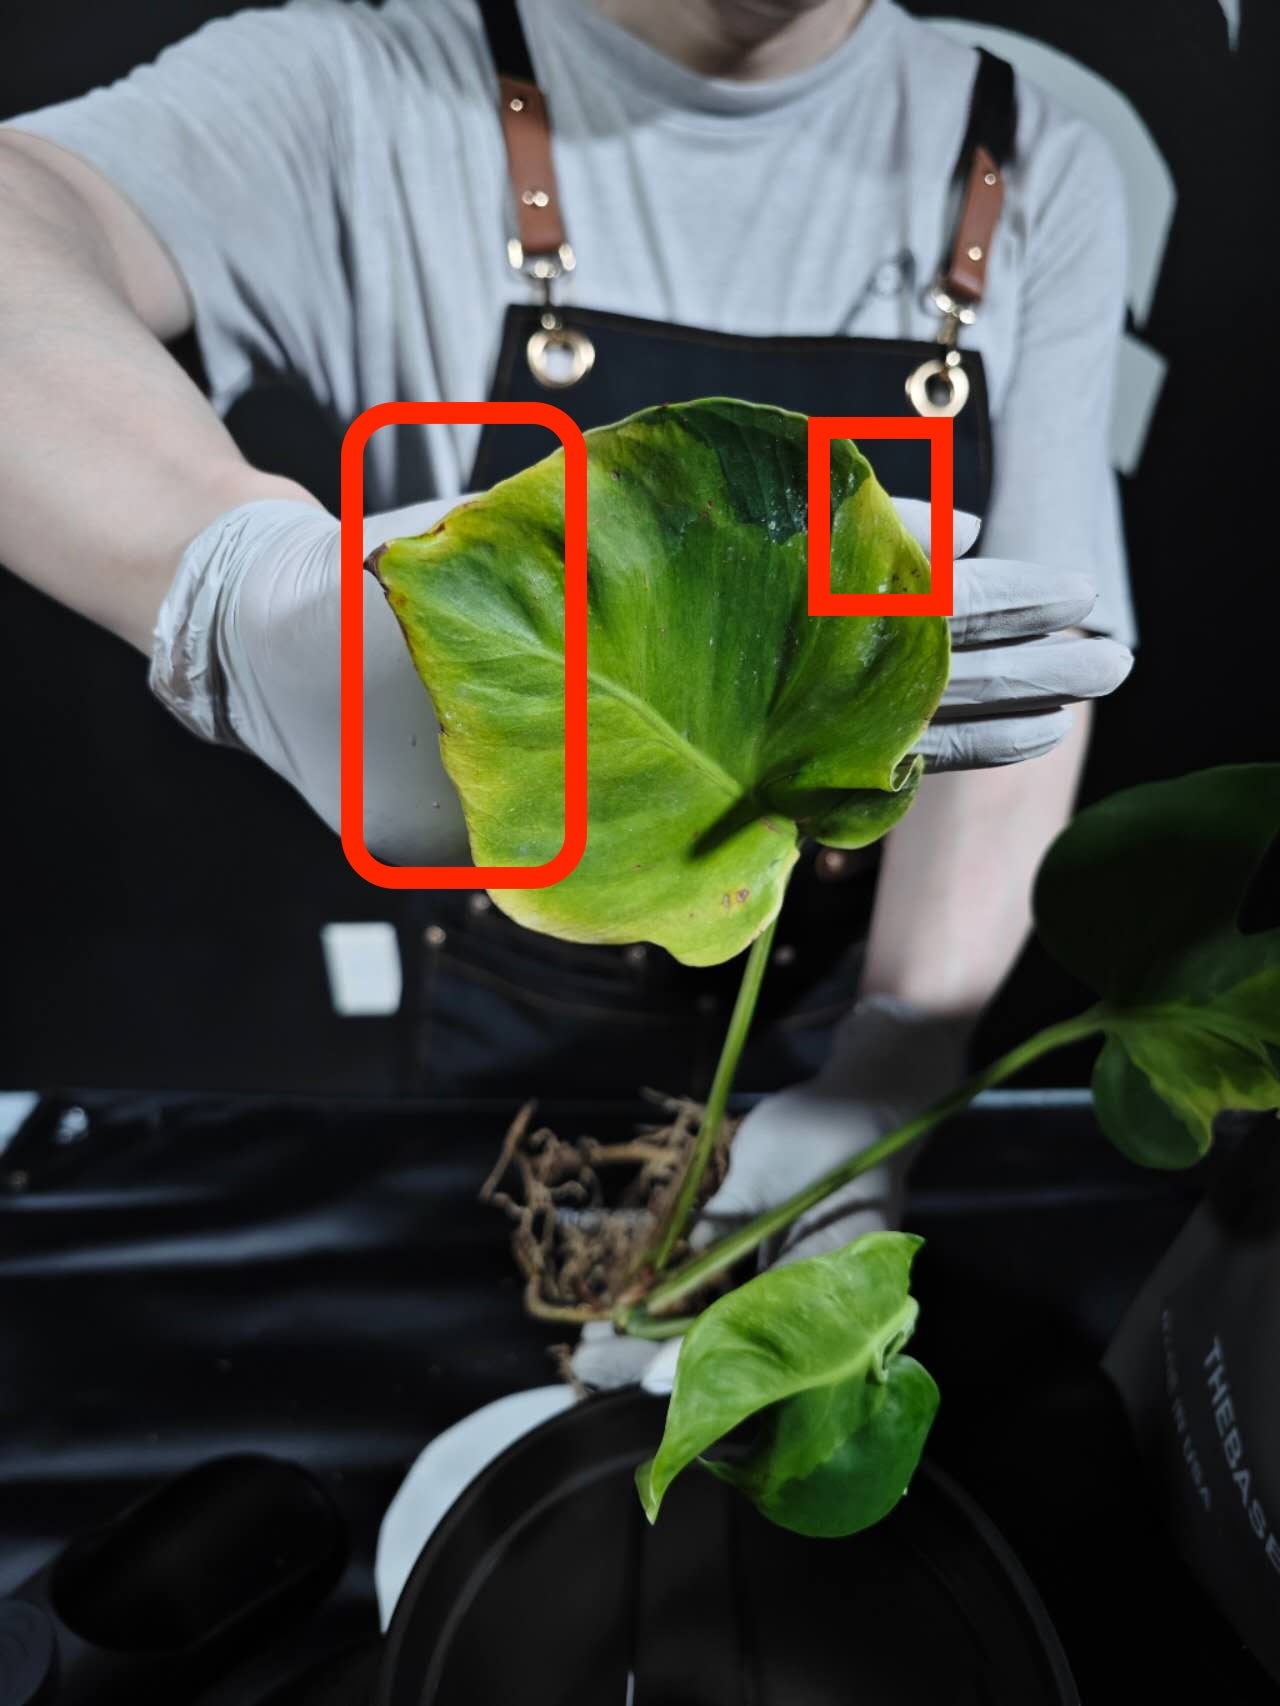
In many cases, you might notice a small amount of yellowing, browning, or leaf edge burn caused by stress during transit.
This is completely normal, and there’s no need to trim, cut, or remove anything.
Plants have their own self-regulating system.
During adaptation, they will naturally shed or sacrifice parts they don’t need.
📌 For example: if a corner is slightly browned like in the photo, just ignore it — it won’t affect the plant’s growth.
Simply proceed to the next care steps as usual.
You’ve made it through the full root and leaf check — well done.
From here, we’ll decide how to move forward, based on the roots.
Just one question to start with:
Is The Root System Strong Enough For Potting?

💧 Water Propagation (for minimal roots only)
Use this method only if root mass is too small after trimming.
If your plant has very few or no roots left after the trimming process, water propagation is the best recovery method.
Here’s how to do it:
- Use a clear container, either glass or plastic — both are fine
- A heavier container helps prevent tipping and keeps the plant stable
- Fill the water so that it just covers the base of the stem, ideally reaching just above where the newest leaf connects to the main stem
🌱 If you’re not sure whether to pot or water-prop, we strongly recommend starting with water propagation and sending us a photo. We’re happy to advise before you commit.
Place the setup in a bright, warm, and stable environment, and change the water every few days.
Once the roots develop to a healthy length, you can transfer the plant to substrate.
Any More Plants?